
In the summer of 2013, I decided to try making a miniature quilt. “Distraction II” was the result.

It is 16″ x 16″ and made from white silk/cotton Radiance fabric. The feathers are from 1/8″ to 3/8″ long. The parallel background lines were not done with a ruler, and ended up about 14 per inch. While I was making it I took a photo with a dime for reference!

You might recognize the embroidery design if you’ve been reading my blog for long. It’s a Zundt design that I’ve used on a number of things, including this dress. This little quilt ended up winning first place in the Miniature category at Houston in 2013!
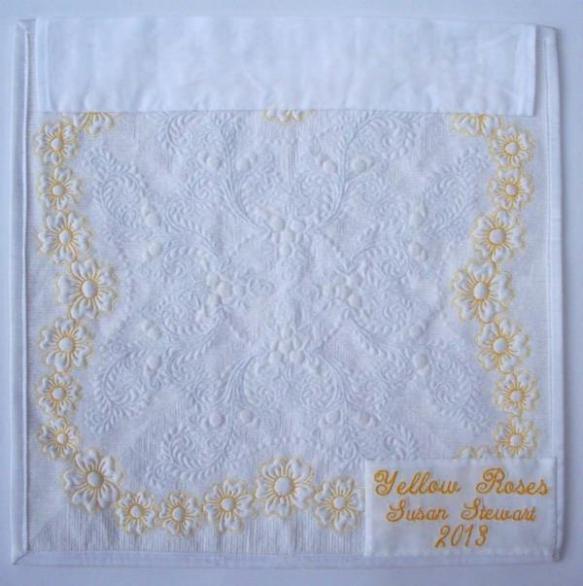
I liked the miniature I entered in the contest so much that I decided to make another, using the center design and similar quilting, for my donation quilt for the Houston IQA auction. With yellow Texas roses, of course!
Days 1 – 5: Make a really cute little quilt, only to realize that the black and white dotted fabric I used for the backing shadows through ![]() ( I had checked, and even used an underlining to prevent shadowing and to keep the cream-colored wool batt from making the white fabric look ivory instead of bright white. Didn’t work. Live and learn!
( I had checked, and even used an underlining to prevent shadowing and to keep the cream-colored wool batt from making the white fabric look ivory instead of bright white. Didn’t work. Live and learn!
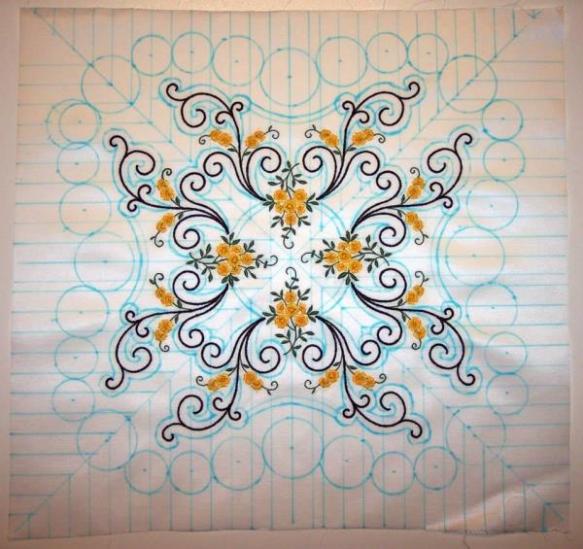
On to Day 6: Embroider a second piece of white silk/cotton Radiance fabric, soak to remove water-soluble stabilizer, press, and mark for quilting.
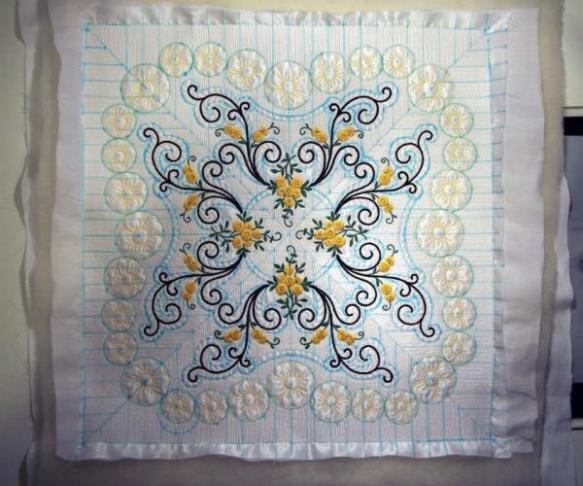
Day 7: Sammy helps with quilting. I have quilted-in-the-ditch of every bit of the embroidery with YLI monofilament, and am trying to quilt the flowers with bright yellow Superior Threads Kimono silk thread.
PS – Cats are no longer allowed in my sewing room. Not long after I made this, Stella, an older kitty, got a hand sewing needle lodged under her tongue and nearly died before the vet discovered the problem!

Day 8: Completed the quilting, all the rest of which was done with white Kimono silk thread. Soak to remove the blue marks, and lay out to dry overnight.


Really beautiful, both of them. Such precise work. Amazing.
LikeLike
Thank you!
LikeLike
It is unbelievably beautiful! What an accomplishment!
LikeLike
Exquisite! What a feast for the eyes, congratulations on another prize winning project.
LikeLike
Absolutely beautiful, such delicate work.
LikeLike
Absolutely stunning! Eve
On Sat, Feb 25, 2017 at 6:56 PM, SusanStewartDesigns wrote:
> susanstewartdesigns posted: “In the summer of 2013, I decided to try > making a miniature quilt. “Distraction II” was the result. It is 16″ x 16″ > and made from white silk/cotton Radiance fabric. The feathers are from 1/8″ > to 3/8″ long. The parallel background lines were not done wit” >
LikeLike
WOW! So much engineering and design to make a most beautiful picture! So unique!
LikeLike
All your quilts are sew beautiful whether they are miniatures or full size. I enjoy seeing everything you create.
LikeLike
Thanks, Betty!
LikeLike
Thanks, Betty!
LikeLike
So pretty! Thanks for sharing it with us!
LikeLike
Thank you, Carol!
LikeLike
Beautiful !
LikeLike