A Red Dress: Part 2 – Houston Quilt Festival

So many of you commented about my new red dress, which I made for the award ceremony at the Houston Quilt Festival! Well, I’m home from Houston after a very enjoyable week, and it’s time for an update. We arrived in Houston on Tuesday afternoon. Part of the prize for the top winners is travel and hotel accommodations. Here I am, ready to go to the convention center for the awards! Makeup, nail polish, Annie Pennington brooch and earrings (of course!) – the works! 🙂

001_2

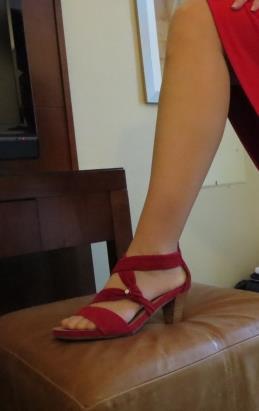
Here are those red shoes!

8

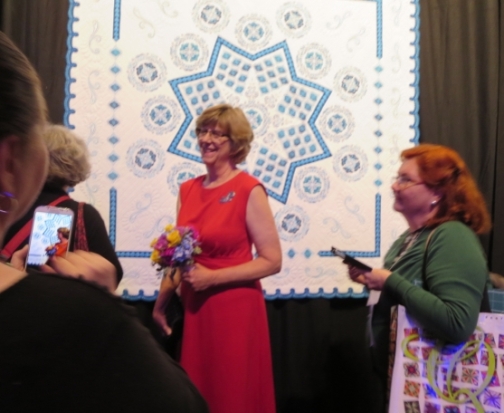
The presentation of the awards is fun, with all of the category awards given first. The blue ribbon winner in each category is revealed from behind a black curtain on the wall of the auditorium, with spotlights focused on that quilt. The eight big awards are given last. My quilt, Blue Plate Special, was awarded the Master Award for Thread Artistry, sponsored by Superior Threads! After the awards are all given, attendees get to get up close to see the winning quilts, and talk to the makers. And, yes, the top winners get flowers! 🙂

017_2

On Wednesday, there is a luncheon at which the top winners all give short speeches, then Preview Night is from 5PM to 10PM. This is the way my quilt was displayed.

025 (2)_2

026 (2)

027 (2)_2

I spent a lot of time in front of my quilt for the next four days, talking to thousands of people.

houston 2015, marcia Baraldi 2_2 houston 2015, marcia Baraldi 3_2

002_2 003_2

You can see all of the prize winners here. I was also awarded an Honorable Mention for my quilt Crystal Garden, but that’s a post for another day.

Here is Blue Plate Special

99930_SusanStewart-048377Capture-048363_2

99930_SusanStewart-detail2Capture-048363_2

99930_SusanStewart-detailCapture-048363_2

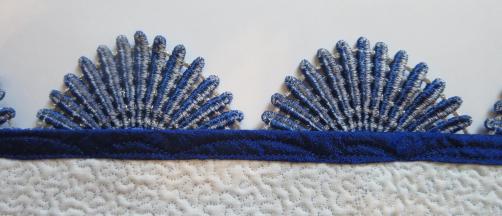
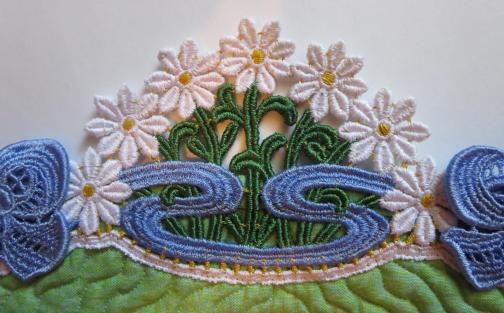
The quilt is 73″ x 73″, and was completed this year. It is white cotton sateen on the front and back. It all started with the dark blue print strip of fabric that surrounds the central star, and forms the border corners. That strip was left over from a quilt kit I cut out for my Mom to piece! The fabric was a print stripe, and this section wasn’t used, so I kept it. The colors for the quilt all flowed out of that little print strip. And the corners are the size they are because that’s all the fabric I had! Those strips were appliqued on, then I used a decorative machine stitch – little satin stitch dots – to accent the edges. All the rest of the color on the quilt is digitized machine embroidery. The more solid-looking, darker areas are machine embroidery applique, done with old Cherrywood fabrics from my stash. The free-standing lace border and the large swirl designs are from Zundt; the rest of the embroidery designs are from OESD. Except for the lace, the embroidery was all stitched on the quilt top only. After the embroidery was completed, I layered the top, batting (Hobbs 80/20 bleached), and backing, then did all the quilting free-motion on my APQS George, which is a sit-down machine. The quilting was done with The Bottom Line thread in the needle and bobbin. I usually like to use silk thread in the needle, but I didn’t think this quilt was going to be good enough to justify the expense! To make the lace, I embroidered segments on water-soluble stabilizer, joined all the segments together in a big loop, then soaked the stabilizer out. I soaked this for a couple of days, with several water changes, because I don’t want any stabilizer to remain in the lace. Then, after the lace was complete, and the quilting was all finished, I stitched the lace to the quilt, using free-motion stitching and monofilament thread. I hope this quilt does half as well at the other shows in which I’ve entered it!

Now, it’s time to get back to work on my quilt to enter into next year’s Houston contest.

015_2

The deadline is only about six months away…

An idea!

I love figuring things out. I like the problem-solving aspects of sewing. I like making things work, using materials and techniques in new ways to achieve a desired result. I like it when ideas swirl in my brain. My brain has been pretty quiet the past few years, with not too much swirling going on. But I had an idea for a quilt I’m working on, and I tried it, and it worked! It feels good 🙂

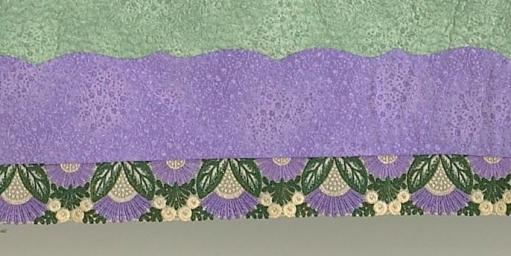
Machine embroidery finds its way into much of my work, both garments and quilt, and sometimes in new and unusual ways. I particularly like using machine-embroidered free-standing lace on my quilts. These are designs that have been specifically digitized to be stitched on a water-soluble substrate, then, when the substrate is dissolved, the threadwork remains. Not every design can be used like this. Well, any design can be stitched on water-soluble stabilizer, but when the stabilizer is dissolved, all that will remain is a wad of thread! FSL designs have a great deal of supportive stitching, and retain their shape when the stabilizer is removed. I’m quite partial to Zundt FSL designs, and all of the samples below are from Zundt.

With free-standing lace, the back of the design will be visible as well as the front. When I attach the lace as an edging or insert on my quilts, the back of the lace can be seen on the back of the quilt. And the back is half the quilt! I want the back to be pretty.

This is lace from the first quilt on which I used FSL (free-standing lace). Here’s the front…

Lace 1 front

Pretty, right? But here’s the back…

lace 1 back

Yuck, I used white bobbin thread, and it definitely detracts from the look. (My quilting tension, with dark blue thread in the needle and white thread in the bobbin, on a white backing, leaves a lot to be desired, as well! But this was one of my first show quilts.)

Using the same or matching color thread in the needle and bobbin solves the problem. Front…

Lace 3 front

…and back.

Lace 3 back

With silver and light gray, I was able to use only light gray thread in the bobbin with good effect. Front…

Lace 4 front

…and back.

Lace 4 back

I almost always use Superior Threads Bottom Line thread in the bobbin for machine embroidery. It’s the perfect weight, it creates no lint, and it comes in lots of colors, so I can match the bobbin thread pretty closely to the top thread.

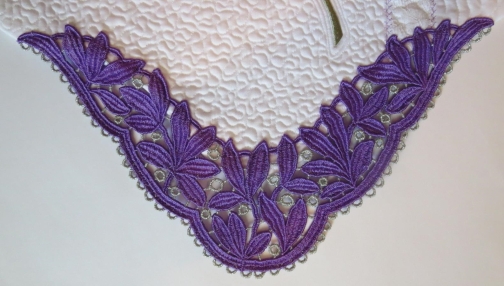
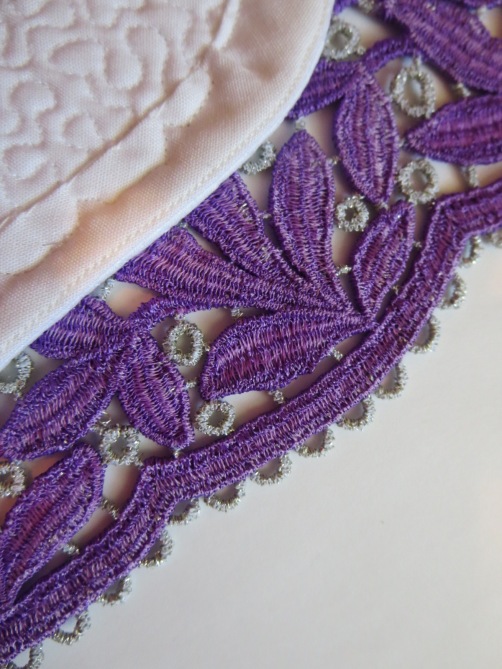
Here’s another sample, front…

Lace 2 front

…and back. I changed bobbin thread, using light gray for the silver metallic sections, and purple for the rest.

Lace 2 back

Okay, now let’s say I’m using a lace design with lots of colors, and I can’t use the same bobbin thread for the whole design without having the back look ugly. And let’s say that I’m making edging for a big quilt, and need to stitch this design 80 or 90 times! That’s a lot of bobbin changes. But we do what we need to do! And that’s what I did for the lace on Gloria’s Garden.

Lace 8 front

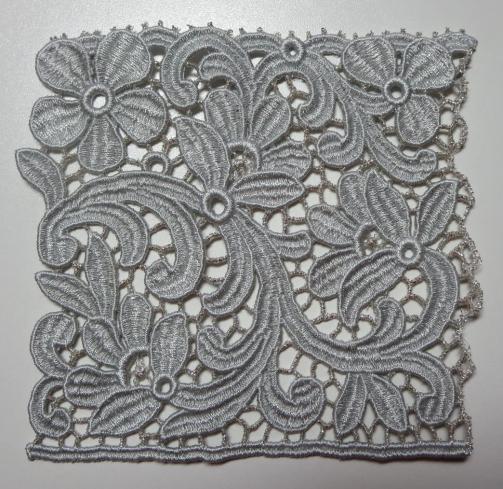
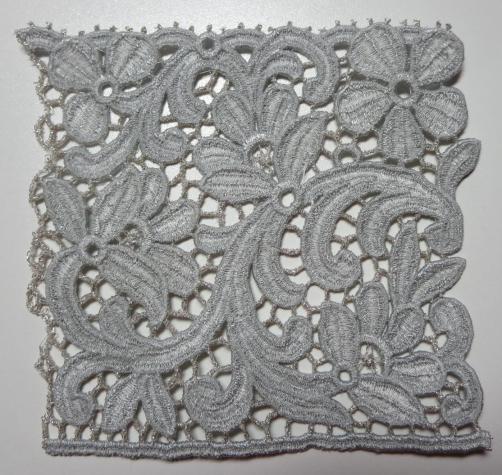
You can see on the back that I changed a lot of bobbins!

Lace 8 back

I’m working on a new quilt. A big quilt. And I want to edge it in lace. And the lace has a lot of color changes. Here’s the front of a section. Lace 6 front

Here’s the back of that section, which I stitched with green bobbin thread.

Lace 6 back

Yuck, right?! Not pretty at all! So….(here’s where the idea comes in!)…I thought, why can’t I use monofilament in the bobbin? I’ve used monofilament in the bobbin for quilting, although not often, and it works just fine. So I wound a bobbin, stitched out some designs, and…

Lace 5 front

Wow! Look at that back!

Lace 5 back

It’ll be great for my quilt! The monofilament bobbin thread even makes the front look better, I think. I used Superior MonoPoly Reduced Sheen Clear. It stitched beautifully on my 15-needle commercial machine. I haven’t tried it on a home combo machine, but I have no reason to think that it wouldn’t work well. I like to dissolve away all the stabilizer in my lace so it has a nice soft hand. The final product with MonoPpoly is just a bit stiffer than if it were stitched with Bottom Line, but not much. An added benefit is that you can wind a LOT of monofilament on a bobbin! I think I’ll do it this way a lot!

Now I know that I’m probably the only person in the world who makes FSL to edge large quilts! But many of you make bookmarks and Christmas ornaments and small FSL items. This technique would be great for that! Try it and let me know if you like it!

Victoria Meets Woodstock

Once in a while, I make a quilt that is not exactly my style!

Victoria_Meets_Woodstock_1200_2

“Victoria Meets Woodstock” (35.5″ x 42″, made in 2009) started with a gorgeous hand-dyed cotton sateen fabric panel from Bryerpatch Studio. It was originally intended for this little quilt I made for Mark’s office door (Mark’s Little Quilts) but I decided the fabric was too pretty to use as a background, and that I needed to do something special with it instead.

So, I embroidered designs from one of the Martha Pullen Kent State book/embroidery CD sets. Not the white or light-colored embroidery as shown on the antique garments, but black embroidery on bright swirling colors! Lots of black free-motion quilting, stitched with fine silk thread, creates the appearance of black Victorian lace.

Victoria detail_2

I had made a black scalloped, machine-embroidered Zundt free-standing lace border, but the quilt ended up too small for the border.  So I used that black lace on a jacket I made for myself! This is not the best picture of me, but it shows the jacket well!

012

I have worn this jacket so much! It’s a texture-y poly knit, it’s comfortable, it goes with everything, it washes well, and it looks good – what else is there? I made it from the t-shirt pattern in The Sewing Workshop’s Trio pattern. Of course, this doesn’t look at all like that pattern! I changed the pattern to have a front opening, V-neck, and long sleeves 🙂 I made facings for the neckline and front opening, then stitched that unused black lace on top.

Okay, back to the quilt…Instead of the black lace, I machine-embroidered individual little free-standing lace flowers (again, Zundt, from the Adorations 3 collection) in the colors of the fabric, and stitched them on the outer edge. If you look at the full photo of Victoria Meets Woodstock at the top of this post, you can see that I matched the colors of the flowers to the colors of the outer edge of the quilt, so that the color flow continued into the flower edge!

I had used those same FSL flowers in Gloria’s Garden. The design is one of the dark purple flowers in the upper left hand corner of this photo.

003

Again, back to Victoria Meets Woodstock! I like my quilt backs to relate to the front – after all, the back is half the quilt! I found this wonderful flowery stripe that was perfect!

Victoria_Meets_Woodstock_back_2

I usually bind my edges in some way, but in this case, I used the backing fabric to make a bias facing.

And check out the label!

Victoria_Meets_Woodstock_BACKSIDE_3

This quilt won 2nd place in the Wall Quilts – Machine Quilted category at the 2011 AQS Knoxville show. That was the only show into which it was entered – I forgot about it until it was too old to enter into any other shows! It’s hard to imagine forgetting about a quilt this bright!

Learning Something New – Day 3

Several months ago, I was working on a challenge quilt with a friend, and was trying to figure out the design for my part of it. I started with a block of black fabric, and stitched radiating lines of triple straight stitch in silver metallic thread. Well, I didn’t like the way that looked with the embroidery designs I was using, so I tried out this beautifully digitized dragon design by Lindee Goodall.

5

I suppose I’ll quilt it at some point and make a small wall quilt, but that will have to take a back seat for now. In any case, I think the dragon looks great!

5a

My goal for this week has been to take a new class every day (or as many days as possible!) and learn something new. I am almost entirely self-taught, and have rarely taken classes, although I have read extensively and worked very hard to develop my skills. But I figured it was time to get a fresh perspective, and be the student for a while, even though it is as an online student.

The Craftsy class I chose for today was “20 Things Every Embroiderer Should Know,” taught by Lindee. Lindee has been digitizing, embroidering, and teaching for a long time. I remember meeting her in an elevator, although I don’t remember where that elevator was! I have also been machine embroidering for many – about 20 – years, but figured there would be things in her class that could help me make my work better.

titleCard20ThingsEmbroiders

If you do any machine embroidery, this is a great class! It covers hooping, stabilizers, needles, threads, tension, and avoiding “un-embroidering.” Most of it was not new to me, but I did pick up some very helpful tips; I especially liked the ones involving duct tape and a disposable razor! (Honestly – nothing kinky here!!!) The last segment on using Embrilliance software didn’t do much for me, but I don’t do any digitizing at all; if you do, you might like it.

If you’d like to improve your embroidery, you might like to take this class, which, like all Craftsy classes, is on sale this week. Click on my affiliate link here to sign up!

Learning Something New: Day 2

Several years ago, I taught this tote bag at a couple of the Martha Pullen schools.

PfaffZundtTote

The animal print is an upholstery fabric, the ivory and orange fabrics are silk dupioni, and the brown is cotton sateen. The embroidery designs are from Zundt. The ivory tiger panel is a large pocket, edged with double piping. The side pockets are piped with single piping, and are just the right size to hold a bottle of water.

12

The body of the tote – like the back shown here – was easily made this way…layer lining, lightweight batting, and outer fabric, then machine embroider the light, open designs to quilt the layers. Student loved it because the positioning and orientation of the designs was random! Hoop wherever you want! Quick and easy. You can see the folded prairie points at the top of the back; they are on the front, as well. Again, easy – folded squares of fabric, stitched into the top binding, then secured at the point with a feed-dogs-down zigzag.

10

Here you can see the zipper that closes the tote. I used a heavy-duty coat zipper. And you can see the detail on the straps, too – straight-grain strips of fabric run through a bias tape maker, then stitched to the backing fabric for the strap in random spacing and angles. The backing is cut wider than the animal print strip, so that when it’s turned right side out, the backing wraps around the seam allowances and forms a kind of built-in bound edge.

I’ve used this tote a lot, which is quite surprising, considering that I rarely wear brown, and I am NOT an animal print kind of person! Leopards, zebras and such are not in my closet or home (well, unless cats count!) But the tote is sturdy and a good size, and it has a secure zipper closing, which most totes do not.

Okay, this brings me to “learning something new.” I am also not a purse person. I don’t change purses with seasons or outfits. I put my stuff in my purse and leave it there until the purse falls apart. I have a good quality black leather shoulder bag that I’ve been using for at least 10 years. Before that, I had a nice black leather shoulder bag that I used for 10 years. The problem is, my current one is worn out, and good quality leather purses give me sticker shock!

Soooo, here comes another Craftsy class for me! I’m taking advantage of this week’s big sale and learning some new things.  This afternoon I watched this class

titleCardLeatherBags

…and I’m ready to make my own leather bag! What a great class! The instructor goes over designing, choosing and cutting leather, supplies, sewing on a home machine, adding zippers, pockets, and lining. He really made it seem very do-able. Leather is one material I’ve never sewn, but I’m more than ready to try! If you’d like to try this class, too, click here.

Maybe if I make my own, I can have a new purse more frequently than once every 10 years!

This post contains affiliate links.

Our Whole Life

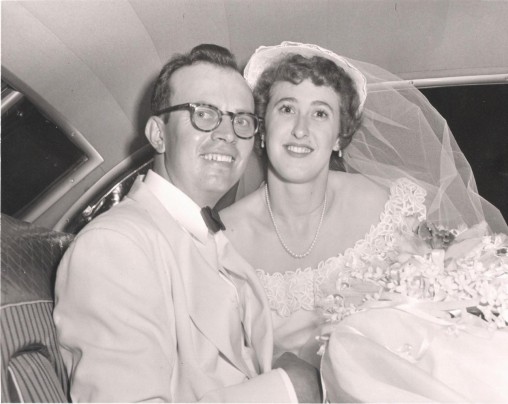
Mom and Dad were married on August 2, 1952, on a very hot day, in an un-air-conditioned church in St. Charles, MO. Legend has it that Mom’s veil caught fire from a candle during the photography or reception (I don’t remember; I wasn’t there!)

Marvin and Gloria 8-2-52

For their 50th wedding anniversary, in 2002, I made them a photo-transfer memory quilt.

anniversary quilt

I used ideas from the book The Collectibles Quilt by Wendy Etzel, 1995, RCW. The book got me started with the idea of a photo transfer bookcase quilt, and I took off from there. (Wendy still has copies of her book available; you can contact her at wendyetzel@verizon.net . The exact pattern for this quilt is not in the book.)

This was the second real quilt I ever made. The first was My Texas Star, half a year earlier. I think this was also the second time I tried free-motion quilting!

I managed to get photos of 5 generations of family, and made enough photo transfers to create 52 “framed” photos on the bookshelves, including my parent’s wedding picture and their wedding invitation.

Our Whole Life detail 3

The titles of some of the “books” are the names of my grandparents, my parents, my sister and me, and our children. Other “books” are titled with significant events or interests in our lives.

Our Whole Life detail 2Our Whole Life detail 1

I added a machine-embroidered a Peace rose (I don’t have a close-up of that) which was my maternal grandmother’s favorite flower, and created a basket made from woven strips of fabric, with a piece of crocheted work spilling out of it. This was made by my father’s aunt, who was born deaf, but crocheted exquisitely.

Our whole Life detail 4

(I didn’t cut up a good piece of crochet work; this was damaged, and I used the un-damaged part in the quilt.)

When they saw the quilt, Mom and Dad were both speechless and teary-eyed, and my father said, “This is my whole life!”

The quilt was hung next to some real bookcases, and causes visitors to do a double-take! It has been the backdrop for many family photos.

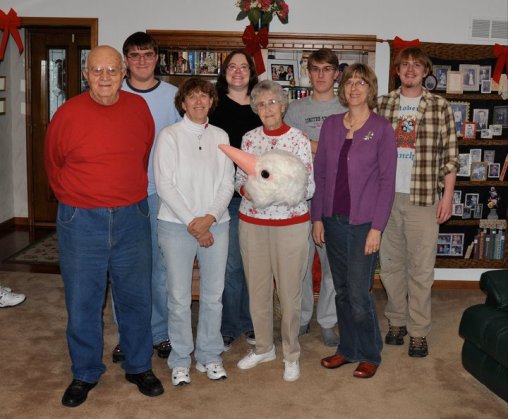
Sean 21bday and Annie 018 Sean 21bday and Annie 016Bird family

Yes, that’s a papier-mâché-and-feather bird head, but that’s another story…

The quilt was displayed at Dad’s memorial service. I think it’s just about the best gift I ever gave!

Arrowmont

My daughter and I will soon be going to Arrowmont School of Arts and Crafts to take a week-long workshop together. Arrowmont is a lovely old crafts school nestled in the Smoky Mountains, hidden just off the beaten path in Gatlinburg, TN. This will be my fifth visit there.

The first time, in 2004, I think, Annie and I took a class in glass fusing. What a wonderful time we had! The next year, she and I tried enameling.

Two years later, in 2007, David joined us, and we took a class in woodworking. It was a blast! Learning something new with grown children, focusing on the task at hand, in beautiful surroundings – well, I highly recommend it!

This is the coffee table David made. After he got home, he finished it, and it was one of his most prized possessions. When everything else in his life fell apart, this was one of the few things he took great care of. It is now in Annie’s living room, and she cherishes it.

100_4611

This was Annie’s wild and crazy table! She included every technique we were taught 🙂 Unfortunately, it sustained some water damage in a closet and had to be discarded.

100_4622

And this is what I made. It was supposed to have a quilt made to go behind the wavy lattice, but that hasn’t happened, and the table is still unfinished.

100_4634

The surroundings are so gorgeous! The entrance to Great Smoky Mountain National Park is just a couple of miles away, and there is a little scenic drive even closer.

100_4575 100_5147 100_4601 100_4570

In 2008, Annie couldn’t make it, and David and I took a workshop in bead-making. Hot glass and torches. These are some of the beads he made.

100_5176

Because they needed to cool overnight in the kiln when we left, the instructor shipped them to us. Sadly, they never made it here. I wish so much I had some of his Arrowmont beads! Aren’t they beautiful?

David had taught himself some lampworking before we went, and fortunately Annie and I do have some of the beads he made at home. She made me a pendant with one of those beads (but of course I can’t find the photo right now!)

I made some beads, too. So what did I do when I brought mine home? Added fabric, of course! I made a quilt. This is “Monochrome.”

Stew_Monochrome_full

It is 45.5″ x 60″ and was made in 2009. It is truly a mixed techniques quilt! It includes English hand smocking (because I needed some hand work to do while my husband was in the hospital for a week), fabric manipulation (inspired from a costume in the stage production of “Phantom of the Opera”), foundation piecing, machine applique, digitized embroidered motifs and free-standing lace. And glass beads above the tassels! It includes cottons, necktie silk, machine embroidery, monofilament, and silk threads, perle cotton, seed beads, glass, purchased tassels, and cotton batting.  Embroidery designs were from EmbroideryOnline, Zundt Designs, and Martha Pullen/Zundt.

“Monochrome” won 2nd place in the Computer-Aided Machine Embroidery category at the 2010 Houston Internation Quilt Festival, and an Honorable Mention at the 2010 AQS show in Paducah.

Here’s a close-up…

Stew_Monochrome_detail

And the beads (click on these images to see them better)…

beads2 beads

Now, it’s been seven years since I’ve been there. Annie and I will be learning about wood-turning. She’s done some, but I never have. If previous years are any indication, it will be a fun, memorable, relaxing, and creativity-inspiring week!

A Very Good Dad

Happy Father’s Day! I was blessed to have a very good father. He’s been gone for 20 months now, but I smile every time I think about him.

100_0799_0001

I’m a lot like Dad (except for the receding hairline!) and I know he was always proud of me. As a farmer, he could have wanted sons to take over the farm, but never once did I feel that he’d rather have had sons than two daughters. He always supported me. I don’t think he really “got” the heirloom sewing career, except that he knew I always liked pretty dresses. But he didn’t really care – if I was happy, he was happy.

023

Then I started quilting. When my first quilt was not just accepted into Houston in 2004, but I got a phone call that it had won a ribbon, I asked him if he and Mom would like to take me down there in their motor home.

100_1035

When we walked into that huge show, he said in amazement, “My mother would have loved this!” And indeed she would have!

That was the beginning of 18 trips with them to Houston and Paducah! I think Dad thoroughly enjoyed those trips. I am still amazed at how cool he was driving that big old motor home through Dallas!  Once, at a truck stop getting fuel for the motor home, I got out and went into the convenience store. The trucker at the next bay looked at Dad, looked at me, looked at Dad again, and said, “Good lookin’ woman you got there.” Dad didn’t blink an eye, and replied, “I did all right for myself, didn’t I?” never letting on that I was his daughter, not his wife! He was so pleased with himself!

Mark went with me a few times, but he was working, and usually it was just Mom, Dad, and me. I had quilts in all but one of those shows, I think, and I was fortunate to win ribbons at most of them – and big ribbons at some. Dad would go to the award ceremonies, and to the preview nights. All he wanted to see was me with my quilt. The crowd noise really bothered him with his hearing aids, and the huge venues and concrete floors bothered his back. But he delighted in taking Mom and me!

This picture was at Houston in 2012. My world would change a lot in the next year.

001

This picture was taken at Paducah in 2013; it was shortly after David died. This was the last quilt show Dad went to, and I think this is the last photo of me with him.

017

Happy Father’s Day, Dad! You were a good man and a great father! 🙂

A Very Versatile Machine Embroidery Design #3

You may have noticed that I use a lot of machine embroidery designs that are not “things.” No animals, no people, no coffee cups, no still lifes. Sometimes floral designs. But mostly, I really like swirl designs that lend themselves to many different looks. I’ve written about two other designs in this post and this post. Today I’m featuring a set of designs (yes, Zundt!) that I’ve used in several ways.

softlightinspirationsset[2]

The designs have a satin stitch outline around a long, open, running-stitch filled center.

Here I used just the smallest design, repeated and mirrored to form a border.

ME borders

When those center fill stitches are stitched with metallic thread, it creates a soft, shimmery look that almost looks like it’s been painted.

All four of the designs were used in “Every Cloud Has A Silver Lining.” (2010)

Stew_EveryCloud_full

Stew_EveryCloud_det_2

The swirl design here is just to the left of the butterflies. I also used a couple of large floral designs and free-standing lace. The fabric is silver gray Radiance, and all of the embroidery (all Zundt) was done with gray Isacord and silver metallic thread. The butterflies, the large lace motifs (the quilt was cut from behind the motifs) and the wide lace edging (not visible in this photo; look at the full shot above) are free-standing lace. It is 85 inches square, and the embroidery used approximately 47,000 yards of thread and nearly 5,000,000 embroidery stitches. After the embroidery on the fabric was done, I free-motion quilted with Superior Threads silk Kimono thread.

This photo is from before it was completed, but it really shows the sparkle from the metallic thread (and Stella the cat says she needed to be in this post!)

005_2

This quilt won the Pfaff Best Machine Workmanship award at Houston in 2010

12

and a first place at Paducah in 2011.

10

But I wasn’t finished with these designs! This is a very different look in “Distraction.”

Distract_full

I pieced white and dark gray Kona cotton, then embroidered swirls over the pieced fabric. I love the way the piecing shows through the metallic-filled swirl centers – a lovely transparency!

Distract_detail2 Distract_detail

One of my favorite parts of this quilt is that I pieced the binding to match the pieced stripes in the fabric! Details matter! 🙂

Distract_detail3

Actually, I wasn’t pleased with the way the edge of the quilt was slightly stretched, so I later took off the binding and re-did it so it would be smoother, but I couldn’t find a picture of the final edge.

Finally, here is a little quilt I made, “Lime Frost”, which will probably be a donation quilt at some point.

3

It is Radiance, apple green and silver metallic thread, and a few Swarovski crystals. Besides the large central swirls that were also used in the other quilts, the smaller corner swirls are from my Craftsy class project.

9

I hope this has inspired you to think of using those embroidery designs in multiple ways, and to use them as the base for lovely quilting!

Mother’s Day

Here in the U.S., we celebrate Mother’s Day this Sunday.  One of the most memorable things I’ve ever done with my Mom is the creation of “Gloria’s Garden.”

Gloria's Garden_full

The quilt is 73″ x 73″, and was made in 2009. Mom chose the fabrics and pieced the top (a variation of “Blooming Nine Patch”, from Traditions with a Twist by Blanche Young and Dalene Young Stone.)  I did the embroidery and quilting.

Gloria's Garden_detail

The lace border and all of the 3-D flowers are digitized free-standing lace, made from over 60,000 yards of thread.  My embroidery machines logged nearly 7,000,000 stitches in the making of this quilt, including over 3,000,000 in the lace border alone.  Embroidery designs are from Zundt and OESD.  That, of course, does not include all the stitching in the quilting, which was all free-motion.

003

The quilt won 1st place in Computer-Aided Machine Embroidery at Houston International Quilt Festival 2009.

Project1_400

And to my breathless delight, the quilt won the $12,000 Gammill Longarm Machine Workmanship award at the American Quilter’s Society Paducah 2010 show. (Note: I quilt on a table-set longarm machine, not a frame system. I move the fabric, not the machine. But that year, the categories were divided by the type of machine, instead of whether the machine was moved over the quilt, or the quilt was moved under the machine. The rules have since changed.)

My daughter surprised my Mom by travelling to the award’s ceremony.

010

To make it even more special, Annie, who is a talented jewelry artist, created matching silver brooches for Mom and me.

002

The flower echoes the shape of some of the free-standing lace embroidered flowers in the quilt, and the flowers I quilted.  The flower center features a small piece of one of the fabrics used in the quilt.

The quilt is now in the permanent collection of the National Quilt Museum in Paducah, KY. The curator of the museum took my photo with the quilt when I was there “visiting” it.

GG at museum

Happy Mother’s Day, Mom!

susanstewart

 Celebrate moms everywhere with Craftsy’s Sale through my link: http://www.craftsy.com/ext/SusanStewart_holiday. I get a small portion of each sale, and you get up to $20 off all online classes!